Table of Contents
Overview
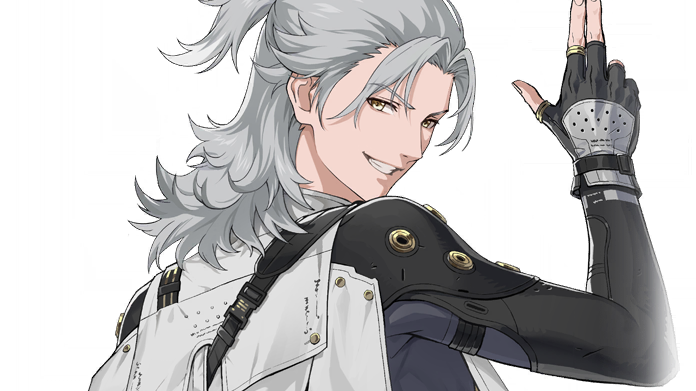
Released in the latter half of game version 1.2, Xiangli Yao is a 5★ gauntlet user of the Electro element, awarded to all players for free so long as they complete Moon-Chasing Festival storyline on time. Even though his kit features tools for both single- and multi-target situations, he ends up clearly specialising in dealing single-target damage.
Kuro Games thankfully skipped most of the usual word salad when describing his gimmick, this time opting to scatter the description of his schtick across both his Forte Circuit and Resonance Liberation skill nodes. I applaud them for diversifying the ways they confuse the playerbase.

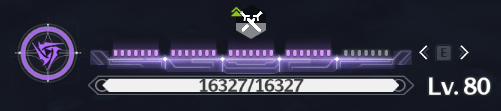
Yao’s Forte works by accumulating Capacity points (shown above) and Performance Capacity stacks (explained later). They exist independently of each other and the game continues to keep track of Yao’s Capacity even when its bar gets hidden by the Performance Capacity tracker.
Capacity points are generated by hitting enemies with Yao’s basic attacks (4 points) and his Resonance Skill (42 points). This can only happen once per damage instance, meaning that multiple enemies taking damage from an attack will not speed the process up.
Once the Forte bar is filled, an audio cue will play and Yao’s Resonance Skill will be replaced by Decipher. Casting it consumes all points of Capacity to deliver an attack roughly twice as strong as his normal skill, with its damage notably counting as Resonance Liberation DMG.
Performance Capacity stacks, on the other hand, are tied to Yao’s Resonance Liberation. After casting it and entering Intuition, Yao’s attacks will start granting him 1 to 3 Performance Capacity. The way it’s listed in-game makes it look lengthy, but the short version is that aside from the first Pivot - Impale in the basic attack chain (granting 1 stack) and Revamp follow-up attack (granting 3 stacks), all other attacks grant two stacks.
Like with Capacity, filling all Performance Capacity bars replaces Yao’s Resonance Skill with another, this time with Law of Reigns. Casting it consumes all stacks of Performance Capacity, plus one of the Hypercubes granted by his Liberation, to deliver a strong attack considered as Resonance Liberation DMG. He’s really into Resonance Liberation DMG, if that wasn’t obvious by now.
This is probably also a good time to mention just what his Resonance Liberation actually does, since half of his Forte is tied to it. Besides dealing damage on cast, it will also have Xiangli Yao enter the aforementioned Intuition state for the duration of 24 seconds, which replaces his basic attacks with Pivot - Impale and Resonance Skill with Divergence, though outside of different labels and animations, they don’t functionally differ from the moves they replace. On top of that, three Hypercubes will start orbiting Yao for the same duration.

Those cubes get consumed and visually disappear whenever Yao uses Law of Reigns as part of his Forte. Using up all three will end the Intuition state early. This however does not affect the Liberation’s cooldown as it starts immediately upon cast.
Something that the game does not list in the ability descriptions is that each of the variants of his Resonance Skill runs on a separate cooldown, letting Yao chain skill casts under right circumstances, which we’ll abuse in his ability rotation.
Another quirk of Xiangli Yao that the game fails to mention is how some of his attacks, namely his final basic attack, Resonance Liberation and skill Law of Reigns, slow down the enemies hit. It’s not as drastic as Rover (Female)’s or Zig Zag’s Stasis effect, but it is enough to throw off parry timings while fighting bosses. This opens Yao to catching more stray hits than usual if you just mash buttons without consideration.
Xiangli Yao managed to exceed any and all expectations set by previously released characters, both in raw damage numbers and playstyle comfiness, by a margin so wide that it stopped being a competition around halfway in. Not only does his average damage output come dangerously close to Jinhsi’s at lower (<50%) Forte charge levels, Yao’s combo achieves it at a fraction of the difficulty and clunkiness of the likes of Calcharo, becoming an unexpected highlight of patch 1.2 both in the gameplay and story departments.
Pros
- Features a very strong and fairly simple to understand kit with an even damage curve
- The slowdown effect during Resonance Liberation helps with reassessing the field after his flashier moves
- Obtainable for free through Moon-Chasing Festival
Cons
- Picky with his Echo substats
- Lacks budget characters that can effectively support him
- His built-in slowdown can throw off parry timings if used improperly
Yao Rotations
Rotations should always be taken with a grain of salt. Enemies are NOT sandbags and WILL ATTACK YOU. Several factors such as Parries, Dodge Counters, and being knocked back will affect how you approach the rest of your rotation.
Liberation Loop Switch-In
This is Yao’s primary skill rotation, used in the main DPS role. Most of the challenge involved with it comes from fitting Thundering Mephis into the overall team rotation as its bonus is tied to the final attack in its lengthy chain. If you opt to use a summon-type Echo instead, it can be fit virtually anywhere in the combo.
As an additional detail, the rotation is able to sustain itself infinitely with the addition of one basic attack chain at the end of it with over 30% Energy Regeneration bonus. However, doing so outside of Illusive Realm is impractical and should be avoided as Yao will miss out on his teammates’ buffs.
| • Echo (Thundering / Tempest Mephis) - use right before executing the rotation • Intro Skill • Basic Attack 1 • Basic Attack 2 • Skill: Deduction • Resonance Liberation • Skill: Divergence • Forte: Revamp • Skill: Law of Reigns • Pivot - Impale 1 • Pivot - Impale 2 • Pivot - Impale 3 • Skill: Law of Reigns • Skill: Divergence • Forte: Revamp • Skill: Law of Reigns • Skill: Deduction • Skill: Decipher • Forte: Revamp - swap during this attack • Outro |
The beginning of the rotation, while looking a little odd, is important to include for two distinct reasons. First and foremost, it allows for ticking off all the boxes granting bonus damage from effects such as Void Thunder set or Stonard’s active. The more of them we can include and the earlier we activate them, the better results we’ll achieve with the rest of Yao’s rotation.
The second, less obvious reason, is the very end of the attack sequence. As Yao does not gain any Capacity points during his Liberation, not taking the opportunity to squeeze in the extra punches and Deduction would not allow him to cast the additional Decipher and Revamp, needlessly limiting his damage potential.
Parry Windows
Disclaimer: This is a work-in-progress section and will be updated as we learn more.
Being a melee character, Yao is able to parry incoming strikes with all five of his basic attacks, Dodge Counter and plunge attack. Note that a successful dodge will chain into Resonance Skill Deduction.
This sentiment does not change when using his Liberation-enhanced attacks, although the Resonance Liberation cast itself cannot parry attacks.
All of Yao’s skills are able to parry incoming attacks.
As is usual with most characters, Xiangli Yao’s Intro can be used to parry an attack if timed correctly. However in his case, attempting to do so deliberately may end up being actively detrimental due to the attack’s unique timing.
Character Synergies
Recommendations
 | Verina | |
| Verina, being an universally strong support, synergises well with all main and sub-DPS characters thanks to the ATK and All DMG Amplify effects that she offers. Xiangli Yao, who likes dealing damage, and preferably a lot of it, is no exception to that. | ||
| Buffs | ||
| • 15% Team-wide All DMG Amplify • 20% Team-wide ATK Bonus • Rejuvenating Glow and Bell-Borne Geochelone | ||
 | Baizhi | |
| Baizhi, being usually an alternative or backup support pick, shares similar buffs with Verina, albeit with the caveats of not being team-wide and needing interaction with an on-field item she drops. | ||
| Buffs | ||
| • 15% All DMG Amplify • 15% ATK Bonus • Rejuvenating Glow and Bell-Born Geochelone | ||
 | Yinlin | |
| Yinlin offers Xiangli Yao pretty much everything he’d ever want from a sub-DPS, providing him with Electro DMG Amplify and Resonance Liberation DMG Amplify effects without hogging too much field time. On top of that, her Chameleon Cipher is a great secondary source of damage for Yao, who can trigger it almost on cooldown. | ||
| Buffs | ||
| • 20% Electro DMG Amplify • 25% Resonance Liberation DMG Amplify | ||
 | Jianxin | |
| The flip side of Yinlin, trading a bit of raw damage output for a bit of defence (shield) and utility (enemy pull). Her raw buff numbers don’t fall much behind Yinlin’s, although she pays for her generous buffing potential with a longer field time. | ||
| Buffs | ||
| • Gather • Shields • 38% Resonance Liberation DMG Amplify • Moonlit Clouds and Impermanence Heron OR Rejuvenating Glow with Originite: Type IV | ||
| Sanhua | ||
| A less-than-ideal choice that’s saved from the status of a honourable mention by being the only dedicated budget sub-DPS Yao can utilise to any degree of success. Sanhua’s Basic Attack Amplify effect doesn’t do much for Yao’s damage output, only really boosting his Pivot - Impale damage, but it does just enough to be noticeable. Even so, Sanhua ends up as little more than a moderately competent placeholder in the team. | ||
| Buffs | ||
| • 38% Basic ATK DMG Amplify • 10%~30% Teamwide ATK Bonus (Resonance 6) • Moonlit Clouds and Impermanence Heron | ||

Honourable mentions
 | Rover (Female) | |
| While fairly competent when filling in the support role, Rover’s Stasis Aura is useless to Xiangli Yao. Not only does the latter already feature a slowdown of his own, the application of it also frees the enemy from Rover’s Stasis effect ahead of time, wasting the effect. As such, if wishing to use Rover on the team, the player should remember to avoid switching them with Yao directly, opting to use their Stasis Aura to support the team’s sub-DPS instead. | ||
| Buffs | ||
| • Stasis aura • Moonlit Clouds and Impermanence Heron OR Rejuvenating Glow (Resonance 4) | ||
Team Comps
Premium
Budget
Skill Priority
- Forte Circuit
- Resonance Liberation
- Resonance Skill
- Intro Skill
- Basic Attack
Yao’s three primary damaging moves - Law of Reigns, Divergence and Revamp - take their damage multiplier from the Forte Circuit node and as such should be prioritised, closely followed by the Resonance Liberation node, which handles the rest of his burst window.
Basic Attack being the lowest priority may seem strange, however Xiangli Yao does not interact with the skill node in any meaningful way. His Pivot - Impale strikes take their scalings from the Resonance Liberation node alone, and the only time Yao should use his basic attacks outside of Intuition is at the very start of his rotation to enable his equipped weapon’s buff.
Weapons
Xiangli Yao’s best weapon is, to nobody’s surprise, his signature gauntlet Verity’s Handle, offering him a metric ton of damage by boosting both his overall Electro element and Resonance Liberation damage, on top of granting a good chunk of critical hit chance through its secondary stat. If rolling his unique weapon is not an option, then Abyss Surges will more than suffice in the role of a stat stick, though their active effect bonus is not only modest, but also doesn’t work particularly well with Yao.
In the 4★ department, things won’t look particularly interesting until version 1.3 when Celestial Spiral becomes available and immediately take the spot for the best out-of-the-box budget gauntlets thanks to its high base ATK, supplemented by a respectable ATK% bonus and extra Resonance Energy. Until then however, Hollow Mirage takes the crown as the prime budget choice thanks to its relative abundance of ATK bonus - at least, as far as low weapon ranks are concerned. When those are taken into account, Stonard shoots way past its competitors and lands itself at the top of the list for the 4★ gauntlet choices, with its main and only downside being requiring spending money to acquire it from the battlepass.
If none of these options are available, Gauntlets of Night are a more than reasonable stand-in until a better weapon can be acquired.
| Weapon Name | Comparison | Notes |
| Verity's Handle | 114.31% | Yao’s signature weapon offers best-in-class performance for Yao. Shocker, I know. It provides a lot of Resonance Liberation DMG Bonus simply tied to a Resonance Liberation cast on top of a respectable All-Element DMG Bonus and crit rate secondary stat. Easily doubles as a competent stat stick for all other gauntlet users currently in the game. |
| Abyss Surges | 100% | The generic 5★ gauntlets find themselves being carried primarily by their high ATK stat, as they fail to give Yao more than a pat on the back with their Basic Attack DMG and Resonance Skill DMG Bonuses. |
| Celestial Spiral | 83.04% (Rank 5: 86.56%) | Releasing as part of the version 1.3, these new 4★ gauntlets find themselves at the top of the budget rankings for Yao thanks to their high base ATK, further increased by their secondary stat and active effect. The extra Resonance Energy provided with the latter isn’t needed in Yao’s case, but free is free. |
| Hollow Mirage | 82.24% (Rank 5: 84.18%) | Hollow Mirage falls into the category of “it just works”. The no-hit bonus is fairly easy to maintain thanks to Yao's built-in slowdown, though it’s not amazing enough to remember about it before rank 5. |
| Stonard | 81.11% (Rank 5: 88.10%) | A fancier set of punching gloves exclusive to the battlepass. A very strong alternative to other listed gauntlets, in large part due to featuring crit rate as its secondary stat. The provided Resonance Liberation DMG Bonus is pretty modest at first, but scales extremely well with weapon ranks. The best budget choice at higher ranks for light spender players. |
| Gauntlets of Night | 74.27% | Reasonable alternative if no other offensive options are available. |
| Gauntlets#21D | 69.28% (Rank 5: 72.03%) | A pair of gauntlets held back by their bad secondary stat and a gimmick that’s annoying to take advantage of. If you find yourself having to dodge a lot of attacks, they may be worth considering, but they’re otherwise just far more expensive Gauntlets of Night. |
| Originite: Type IV | 67.55% | A decent set of gauntlets primarily used in conjunction with the Rejuvenating Glow set. In Yao’s case however, they are being held back by their low base ATK and lack of a usable effect. Strictly worse Gauntlets of Night. |
| Amity Accord | 65.55% (Rank 5: 68.67%) | If they had literally any offensive secondary stat, Amity Accord would easily punch through the competition and be near the top of Yao’s available 4★ options. Better kept on Yuanwu. |
| Guardian Gauntlets | 62.96% | Amity Accord Lite. Same problem and same what-if, but at a 3★ rarity (though arguably better looking). |
| Marcato | 62.42% | A utility-focused pair of gauntlets that enable faster rotations for certain characters by granting them more Concerto energy. Unfortunately, Yao is not one of those characters and is better off using another weapon. |
| Gauntlets of Voyager | 61.44% | A pair of gauntlets so all over the place that the light hitting the atmosphere is a focused laser beam in comparison. It offers Yao absolutely nothing of value to his kit and comes with the lowest base ATK in the weapon class. Best fed to a better weapon and forgotten about. |
Echoes
Sonata effects
| Set Effect | Comparison | Notes |
| Void Thunder 5p | 100% | The current best option for Xiangli Yao. It offers a sizable Electro% bonus at the condition of hitting an enemy with a heavy attack or Resonance Skill, giving it a slight but noticeable ramp-up period. |
| Void Thunder 2p + Lingering Tunes 2p | 92.03% | This combination should only ever be used as a transition set. |
| Lingering Tunes 5p | 91.55% | An alternative set suffering from a 6 second ramp-up period, an unfavourable buff type and very low magnitude of said buff, working especially terribly on Xiangli Yao. |
Active Echo Recommendation
Void Thunder: Thundering Mephis - The technically-best and at the same time most depressing option out of the entire Void Thunder lineup as of version 1.2 . Its desirable 12% damage bonus to both Electro DMG and Resonance Liberation DMG is held back by a lengthy 6-hit attack sequence taking 4 seconds to finish - which is somehow even longer than Inferno Rider’s. Because of this, trying to incorporate Thundering Mephis into the team rotation more often than not tends to be a net DPS loss.
Void Thunder: Tempest Mephis - The less annoying Mephis, boosting by 12% Electro DMG and Heavy Attack DMG instead. For Yao, that’s half the bonus for half the problem of fitting the Echo into the team’s overall rotation. Still not amazing, but swapping out of the second attack at least prevents it from being a DPS loss.
Void Thunder: Electro Predator - A sad alternative of an Echo, trading away all buffs and most of the damage output for the convenience of not interrupting the combat flow. The only reasons to consider it in the first place are that it’s a summon-type Echo and that it can be used twice during Yao’s combo, as it lacks absolutely any other saving grace with its low damage output and delay before said output even starts. If opted into, treat it more as a placeholder for a better Echo.
Lingering Tunes: Mech Abomination - The only viable choice for the Lingering Tunes set if you insist on using it. It deals a somewhat respectable amount of damage and buffs your attack by 12% for 15 seconds. It's worth pointing out that Mech Abomination provides its benefits without sacrificing character field time or interrupting any actions.
Mainstat and Substats
4-3-3-1-1
| Cost | Stat |
| 4 | Critical Rate % / Critical DMG % |
| 3 | Electro % / ATK % |
| 3 | Electro % |
| 1 | ATK % |
| 1 | ATK % |
Unlike most other characters, Xiangli Yao prefers Crit Rate% on his 4-Cost Echo regardless of weapon used. This is thanks to his minor stat nodes boosting critical damage. The difference in average damage is very small however, so if you prefer following the usual rule of picking Crit DMG% Echo for your Crit Rate% weapons, the final word will depend on the rolled substats.
Things look a little different with his 3-Cost Echoes though. With certain weapons equipped, Yao will prefer to run an Electro% + ATK% setup as opposed to double Electro%. This is mostly the case for Verity's Handle and Stonard, but in case you opt to run a different gauntlet, here’s full list:
4-4-1-1-1
| Cost | Stat |
| 4 | Critical Rate % |
| 3 | Critical Rate % / Critical DMG % |
| 3 | ATK % |
| 1 | ATK % |
| 1 | ATK % |
The 4-4-1-1-1 setup is a straight downgrade from the standard 4-3-3-1-1 setup, sacrificing too much Electro% to be a viable alternative as attempting to compensate the loss with Resonance Liberation DMG Bonus would net greater benefits by applying the same Echo stat line to the 2x Electro% 4-3-3-1-1 setup.
If you nevertheless insist on running it, gauntlets with innate critical hit chance like Verity's Handle and Stonard will prefer to run Crit Rate% + Crit DMG%, while all other weapons will prefer dual Crit Rate% setup. In order to break even on the loss of elemental damage, you need at least three substats worth of Resonance Liberation DMG Bonus on top of the usual ATK%, Crit Rate% and Crit DMG%.
Sub stats priority
| Sub Stat Priority |
| Crit Rate = Crit DMG > ATK% > Flat ATK > Resonance Liberation DMG > Resonance Skill DMG |