Table of Contents
Overview
Important Terminology
- Vigor: A resource tied to your Resonator, which is used to enter a stage and completing a stage.
- Interference: Buffs active for specific Tower.
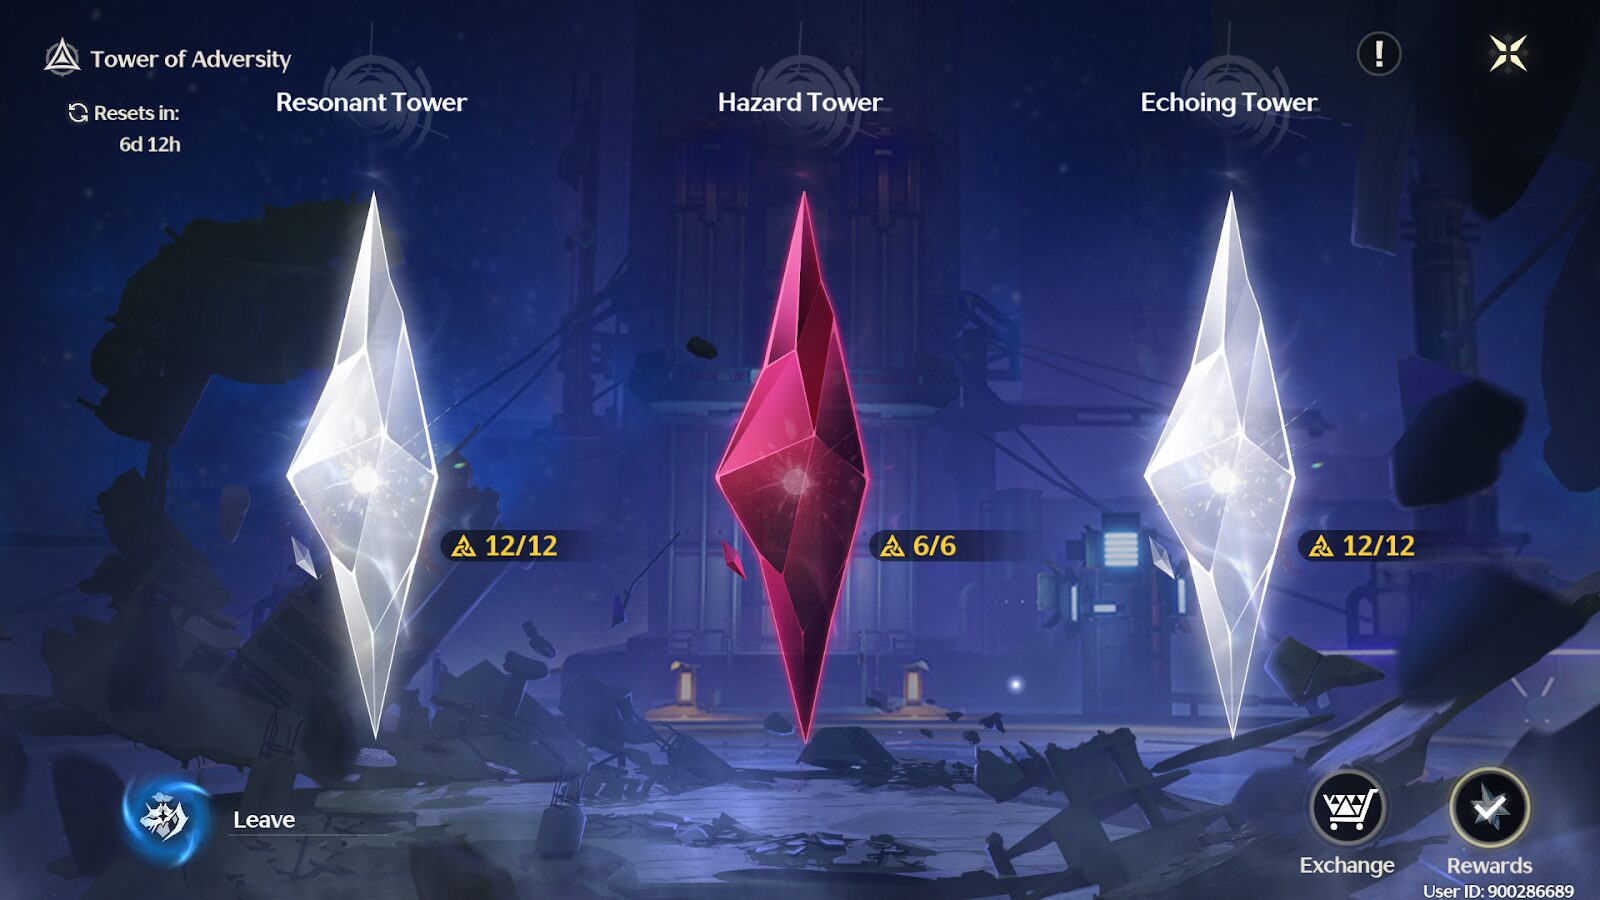
What is the Tower of Adversity: Hazard Zone?

Tower of Adversity (ToA) is a recurring challenge stage that requires you to complete increasingly difficult stages to obtain rewards. These stages are time trials featuring several Overworld enemies and bosses with bumped-up stats.

Unlike Tactical Challenge, each stage will require a certain amount of Vigor to enter and complete. This means that half the challenge is managing the Vigor levels of Resonators in your teams to ensure they can enter each stage. Thus, players are rewarded for building a wide variety of Resonators rather than focusing on a single team.
Vigor Distribution
Before diving into Vigor distribution, keep in mind that all towers require a total of 10 Vigor each.

A common way to distribute Vigor in Resonant/Echoing Tower is to split stages 1+4 and 2+3 to different teams (e.g. The image above has Jiyan handles Stage 2+3 on both Echoing and Resonant Towers totaling to 10 Vigor. While Encore and Jinhsi teams handle stage 1 and 4 of Resonant and Echoing Tower totaling to 5 Vigor each).
If you wish to use two teams for Hazard Tower, each team can tackle 1+4 on each side. Distributing your Vigor this way allows you to pick stages where each team will shine.
Alternatively, you can have 1 team per tower if you do not need a specific team for a stage. This is easiest and requires no thought into placements.
Recommended Investment for 30▲ Crest Clear

All main-DPS are S0 and Jinshi does not have signature weapon
For a full 30▲ clear, the bare minimum requirement is to have at least 3 well-built main DPS, 2 sub DPS, and 1 or 2 support units. Additionally, Echoes and weapons are not locked upon clearing a stage. This allows you to share equipment between Resonators.
Generally, support Resonators can be left at a low level, as they only need Bell-Borne Geochelone, a 5pc Rejuvenating Glow set, and a way to trigger it.
Resonant Tower
Note that once your Resonators hit level 70, you should be able to solo or duo stages 1–3 with ease. However, there is no shame in bringing a full team to stages if you are struggling.
Resonators marked with ★ perform well in that stage, and Resonators marked as ⚠ have multiple or core enemies that resist their element.
Tower Buffs

- Characters’ Electro DMG Bonus is increased by 30%.
- DMG dealt by Resonators off field is increased by 100%
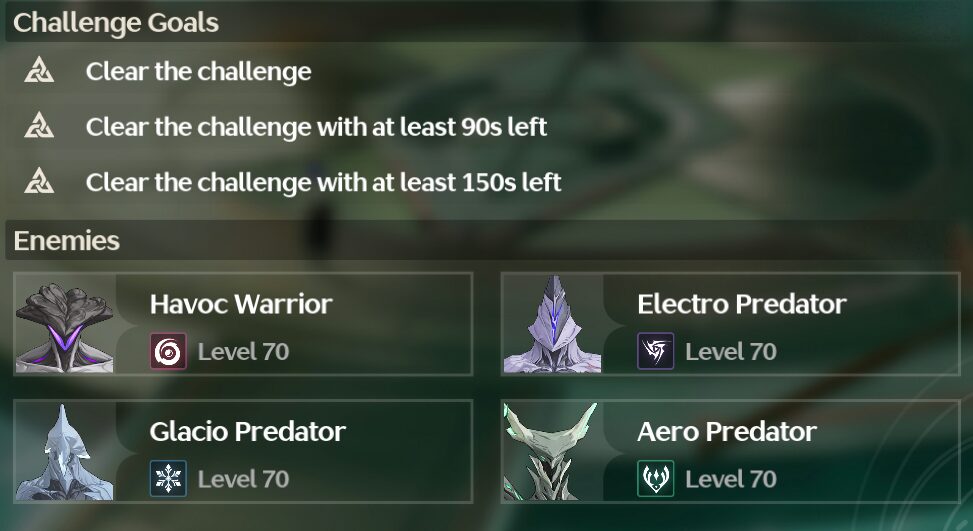
Stage 1
Enemy List:
Character Recommendations
| Main DPS | Sub DPS | Support |
| Calcharo ★ Jiyan ★ Jinhsi ★ Encore ★ Rover (Havoc) ⚠ Danjin ⚠ Chixia Lingyang | Yinlin ★ Mortefi ★ Yuanwu ★ Sanhua ★ Rover (Spectro) | Verina ★ Jianxin ★ Yangyang ★ Baizhi Taoqi |
Your standard AoE centric floor with 3 waves of enemies. For this stage, Resonators who can gather enemies are key picks to clear in a timely fashion.
Stage 2
Enemy List:

Character Recommendations
| Main DPS | Sub DPS | Support |
| Calcharo ★ Jiyan ★ Jinhsi ★ Encore ⚠ Rover (Havoc) ⚠ Danjin ⚠ Chixia ⚠ Lingyang | Yinlin ★ Mortefi ★ ⚠ Yuanwu ★ Sanhua ★ Rover (Spectro) | Verina ★ Jianxin ★ Yangyang ★ Baizhi Taoqi |
Focus target any Young Roseshrooms on stage 2, as they cannot move or be Crowd-Controlled. Additionally, the rest of the enemies in the stage will always come closer to you allowing you to hit the Young Roseshrooms alongside the rest of the enemies.
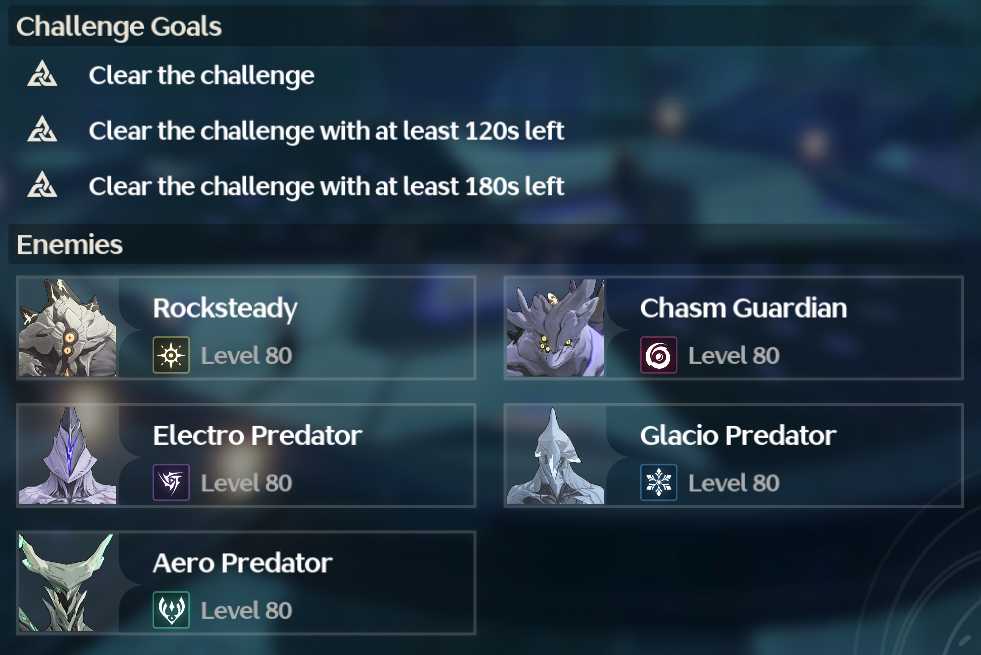
Stage 3
Enemy List:
Character Recommendations
| Main DPS | Sub DPS | Support |
| Calcharo ★ Encore ★ Jinhsi ★⚠ Jiyan ★ Rover (Havoc) ⚠ Danjin ⚠ Chixia Lingyang | Yinlin ★ Mortefi ★ Yuanwu ★ Sanhua ★ Rover (Spectro) | Verina ★ Jianxin ★ Yangyang ★ Baizhi Taoqi |
There is really only one threat on this stage, and it is the Chasm Guardian. We recommend focus targeting it as well as the Rocksteady, and using AoE attacks to take care of the remaining mobs.
Video Showcase
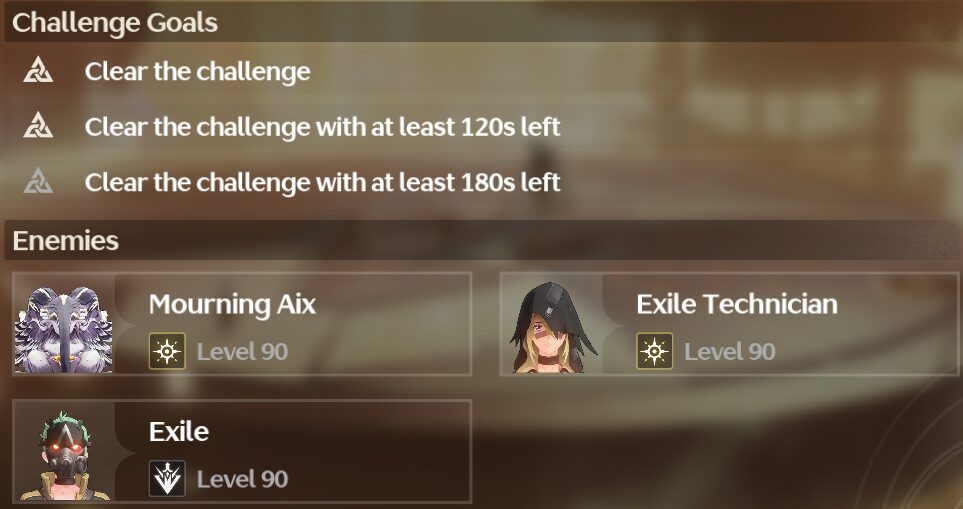
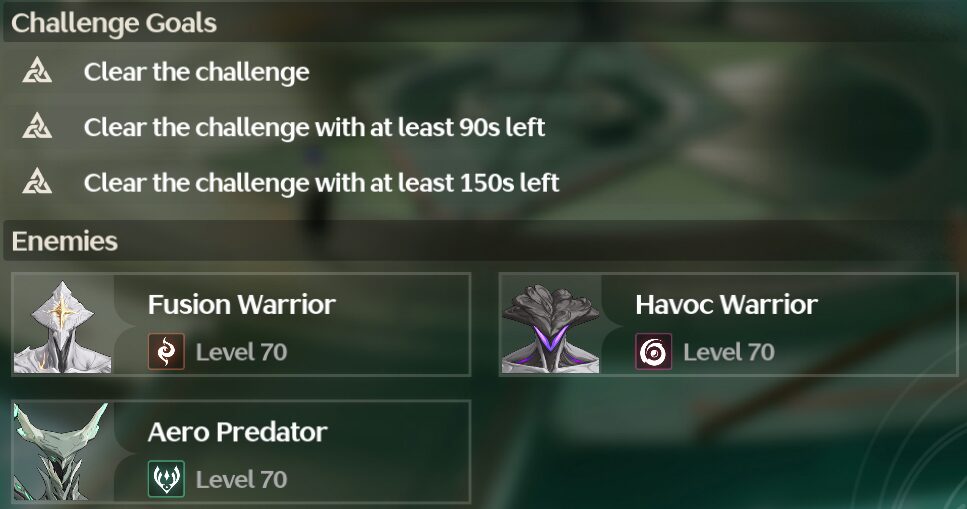
Stage 4
Enemy List:
Character Recommendations
| Main DPS | Sub DPS | Support |
| Calcharo ★ Encore ★ Rover (Havoc) ★ Jiyan ★ Jinhsi ⚠ Danjin Chixia Lingyang | Yinlin ★ Mortefi ★ Yuanwu ★ Sanhua ★ Rover (Spectro) ⚠ | Verina ★ Jianxin ★ Yangyang Baizhi Taoqi |
Finally, we have the first menace of ToA, the Exile Technician. If left unchecked, the Exile Technician will constantly spam shield effects for the entire team, prolonging clear time. There is no other way to counteract this other than by stunning or defeating her.
If you have successfully defeated the first wave of enemies with around 4:20~4:30 time remaining, the run should be smooth sailing from there. The second half of this stage is Mourning Aix, and this version of the boss is an absolute pushover; it has low HP and doesn’t have any new moves from its Tactical Hologram counterpart.
Video Showcase
Echoing Tower
Note that once your Resonators hit level 70, you should be able to solo or duo stages 1–3 with ease. However, there is no shame in bringing a full team to stages if you are struggling.
Resonators marked with ★ perform well in that stage, and Resonators marked as ⚠ have multiple or core enemies that resist their element.
Tower Buffs

- Gain Spectro DMG Bonus is increased by 30%.
- Gain 20% Resonance Skill DMG Bonus. Targets hit by Resonance Skills will take additional Aero DMG every second for 18s.
Stage 1
Enemy List:
Character Recommendations
| Main DPS | Sub DPS | Support |
| Jinhsi ★ Jiyan ★ Encore★ Calcharo ★ Rover (Havoc) ★ Danjin Chixia Lingyang | Yinlin ★ Mortefi ★ Sanhua ★ Yuanwu Rover (Spectro) | Verina ★ Jianxin ★ Yangyang ★ Baizhi Taoqi |
Your standard AoE centric floor with only one wave of enemies. For this stage, Resonators who can gather enemies are key picks to clear in a timely fashion.
Stage 2
Enemy List:

Character Recommendations
| Main DPS | Sub DPS | Support |
| Calcharo ★ Jiyan ★ Jinhsi ★ Encore ⚠ Rover (Havoc) ⚠ Danjin ⚠ Chixia Lingyang | Yinlin ★ Mortefi ★ ⚠ Yuanwu ★ Sanhua Rover (Spectro) | Verina ★ Jianxin ★ Yangyang ★ Baizhi Taoqi |
Similar to the previous stage, this is an AoE centric stage with only 2 waves of enemies. A second set of Fusion Dreadmanes will spawn after defeating the initial wave. You will ALWAYS want to prioritise Havoc Dreadmane, as the remaining enemies will always swarm towards you and can be easily CC’d.
Stage 3
Enemy List:
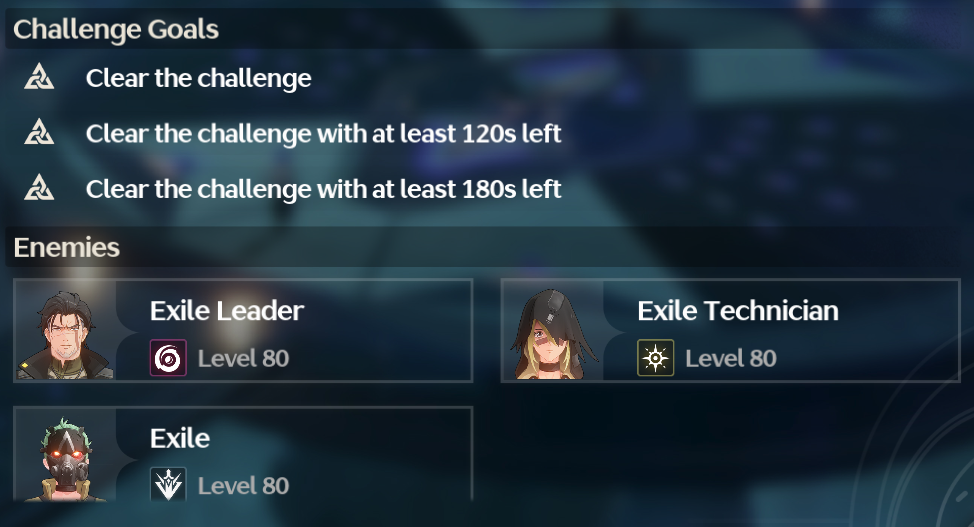
Character Recommendations
| Main DPS | Sub DPS | Support |
| Jinhsi ★⚠ Encore ★ Calcharo ★ Jiyan ★ Rover (Havoc) ★ ⚠ Danjin ⚠ Chixia Lingyang | Yinlin ★ Mortefi ★ Yuanwu ★ Sanhua ★ Rover (Spectro) ⚠ | Verina ★ Jianxin ★ Yangyang ★ Baizhi Taoqi |
We have the return of an absolute menace: the Exile Technician. Once again, reminding us that if ignored, she will provide the entire enemy team with shields. It is HIGHLY recommended to prioritise her over every other enemy at this stage. As she can single-handedly make this stage longer to clear
The next priority should be the snipers, as the Exile Leader has several attacks that will constantly gap close or teleport toward you.
Video Showcase
Stage 4
Enemy List:
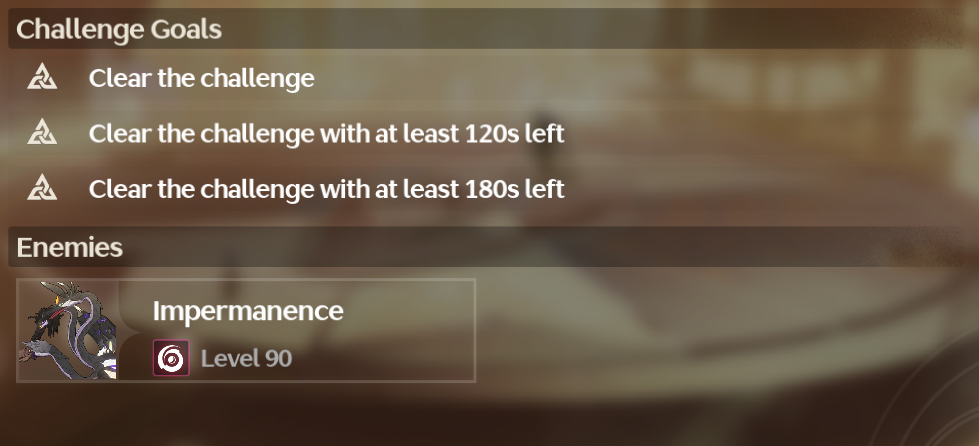
Character Recommendations
| Main DPS | Sub DPS | Support |
| Jinhsi ★ Encore ★ Calcharo ★ Jiyan ★ Chixia Lingyang | Yinlin ★ Mortefi ★ Yuanwu ★ Sanhua ★ Rover (Spectro) | Verina ★ Jianxin Yangyang Baizhi Taoqi |
To round things off, we have a stage featuring general bosses that have had their numbers bumped up. If you are familiar with the overworld version of Impermanence Heron, then this stage is purely a damage/stat check. This version of the boss does not have any of the enhanced attacks from the Tactical Hologram version.
If you need a refresher on Impermanence Heron’s Moveset, feel free to check out this guide.
Video Showcase
Hazard Tower
Resonators marked with ★ perform well in that stage, and Resonators marked as ⚠ have multiple or core enemies that resist their element.
Tower Buffs

- Attribute DMG Bonus increased by 30%
- Casting Resonance Skill grants the Resonator 60% Resonance Liberation DMG Bonus for 15s and casting Resonance Liberation grants the Resonator 60% Resonance Skill DMG Bonus for 15s.
Stage 1
Enemy List:
Character Recommendations
| Main DPS | Sub DPS | Support |
| Jinhsi ★ Encore ★ Rover (Havoc) ★ Jiyan ★ Danjin Calcharo ⚠ Chixia Lingyang | Mortefi ★ Sanhua ★ Yinlin ⚠ Yuanwu ⚠ Rover (Spectro) | Verina ★ Jianxin Yangyang Baizh iTaoqi |
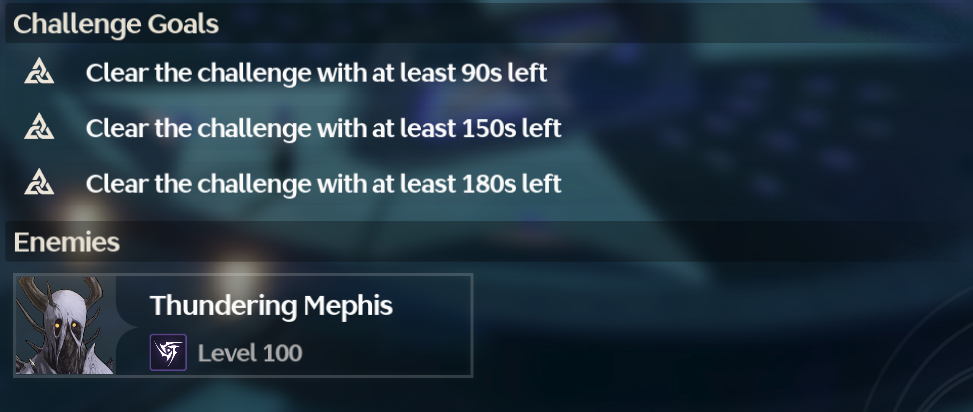
Another general boss stage with bloated numbers, but now Thundering Mephis has an extra 10 levels compared to the previous floor 4 towers. As you would expect, this version of Thundering Mephis has the same moveset as its Overworld counterpart.
As a general rule of thumb, Thundering Mephis has several attacks that can be parried and will periodically jump away. The easiest way to deal with Thundering Mephis is to stay close, giving you better DPS uptime and more parry chances.
Video Showcase
Stage 2
Enemy List:

Character Recommendations
| Main DPS | Sub DPS | Support |
| Jinhsi ★ Encore ★ Rover (Havoc) ★ Calcharo ★ Jiyan ⚠ Danjin Chixia Lingyang | Mortefi ★ Sanhua ★ Yinlin ★ Yuanwu ★ Rover (Spectro) | Verina ★ Jianxin Yangyang Baizh iTaoqi |
Finally, we have the final challenge stage, featuring 2 waves of enemies. The first wave of enemies aren’t tanky but have some nasty attacks. The real threat are the Junrocks. They have attacks that can be hard to spot when there are several attack animations on the screen.

Focus your attacks on the Stonewall Bracer as the Junrocks tend to get hit by AoE attacks and are not tanky. You will want at least 4:20 time remaining but securing a 4:30~4:40 isn’t too difficult either.
As for the second wave, we have another Overworld boss, the Feilian Beringal. You know the drill by now - bloated stats, and the exact same moveset as its Overworld counterpart.
Video Showcase