Table of Contents

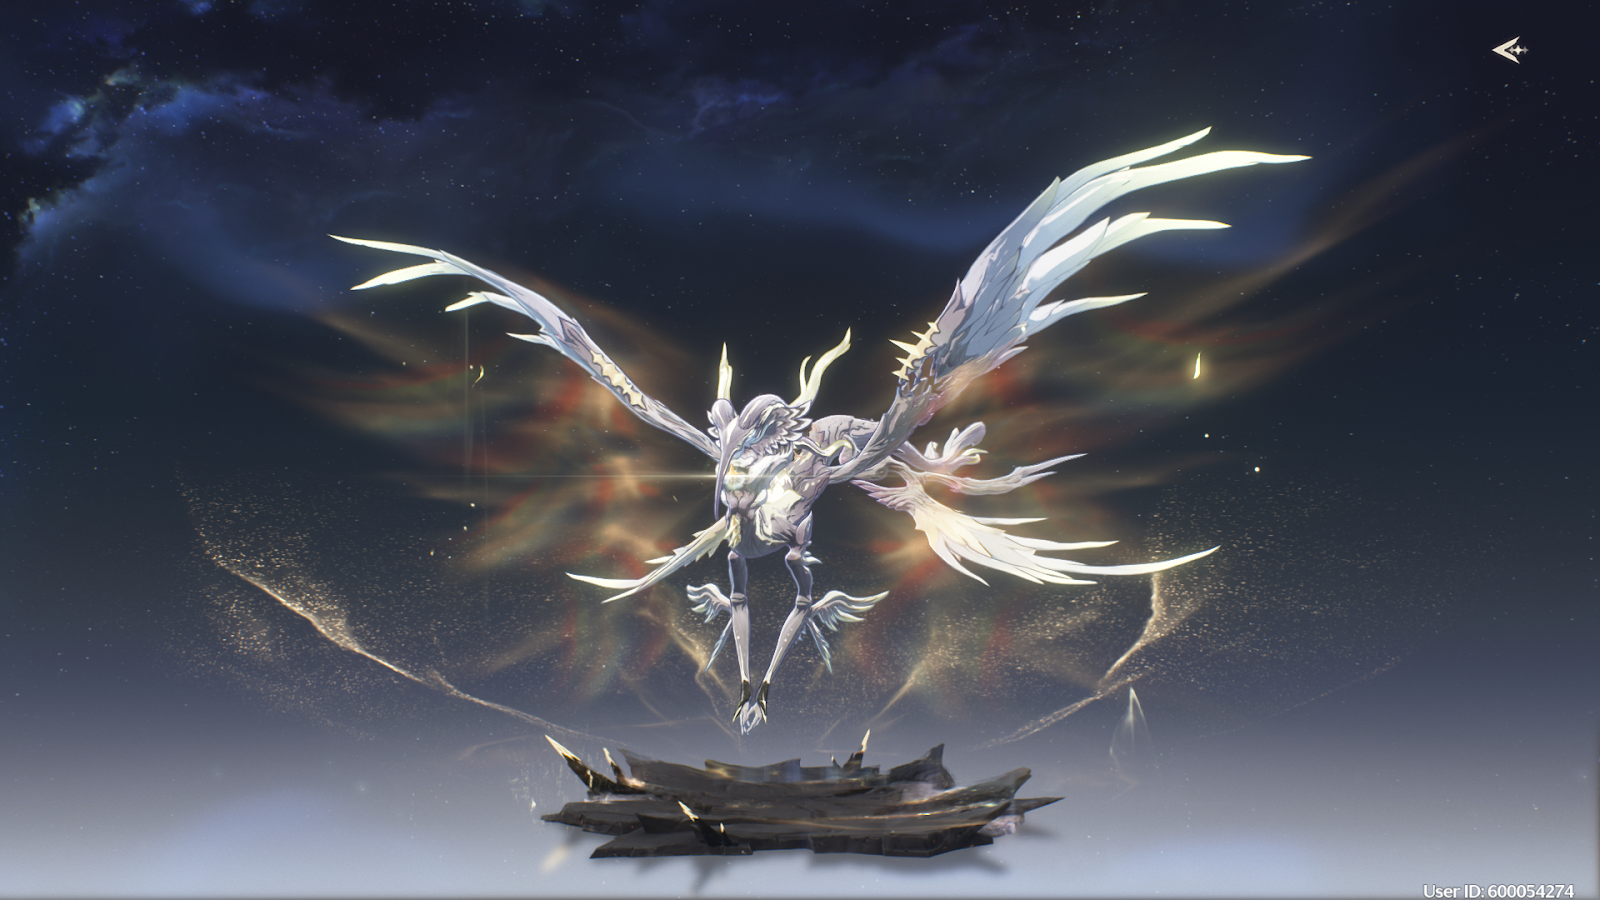
Mourning Aix is one of the Tactical Holograms available in Wuthering Waves version 1.0. Defeat the boss to get First-Clear Rewards, including Astrite, Mourning Aix Echo, Data Set, Premium Sealed Tube, and Shell Credit.
Where to Find Tactical Hologram: Mourning Aix
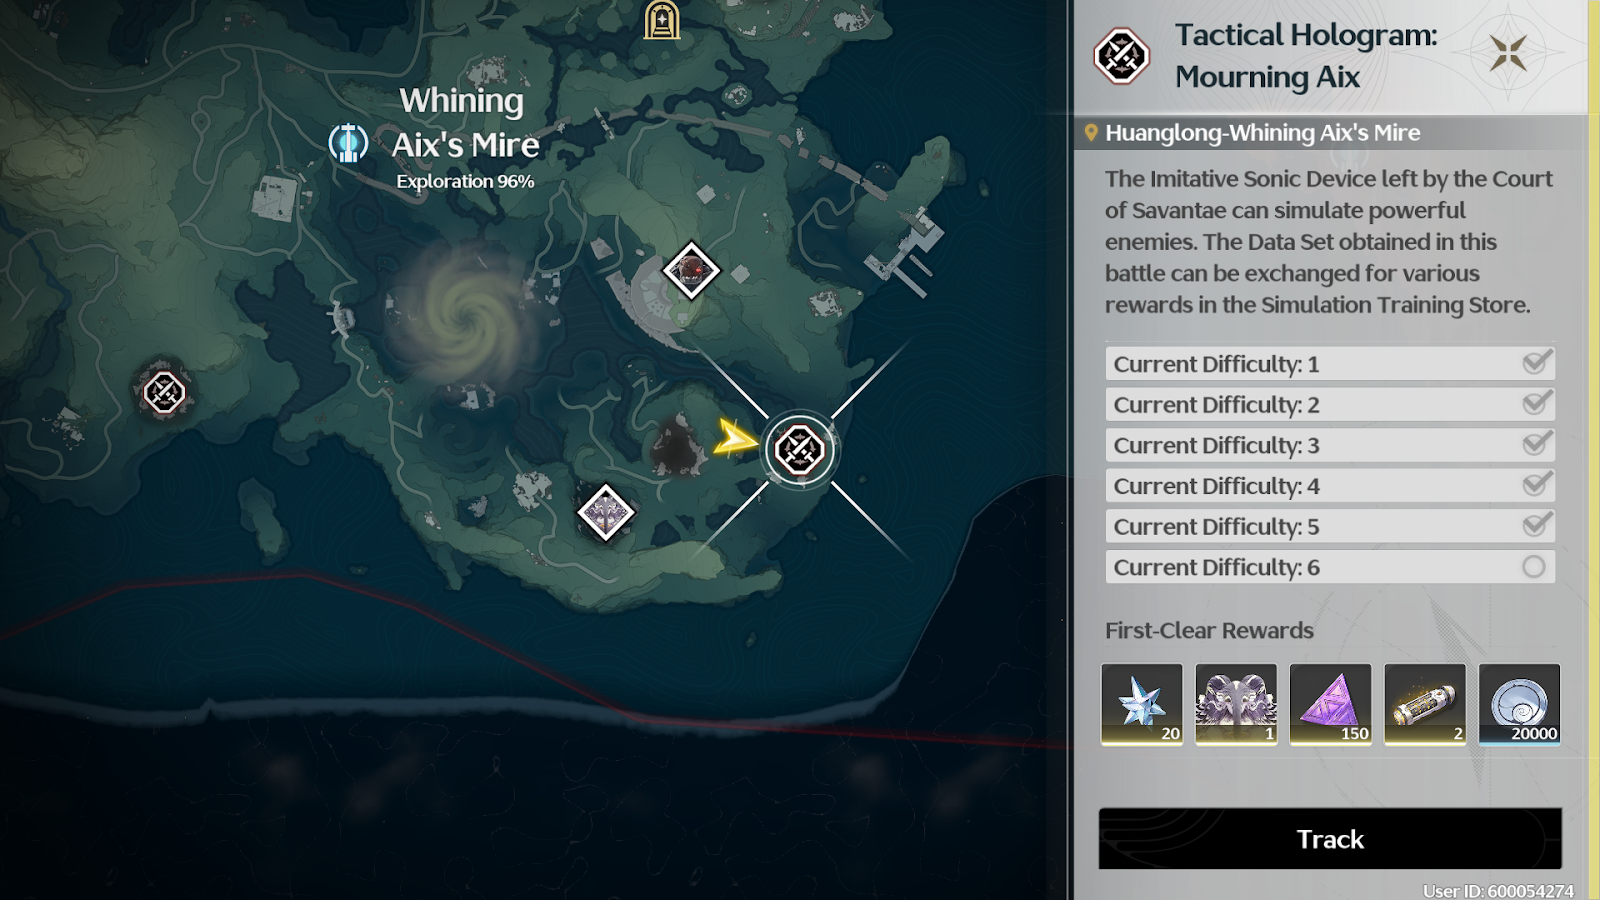
You can find Tactical Hologram: Mourning Aix in the southeastern corner of the Whining Aix’s Mire, east of the world boss version of itself and south of the Mech Abomination world boss. Its arena is located on top of a cliff overlooking the sea between Whining Aix’s Mire and Mt. Firmament.
Different Difficulty Leads to Different Movesets
Like other Tactical Holograms, Mourning Aix has six difficulty levels, each one raising its level and aggressiveness as well as expanding its available moveset, modifying some attacks with additional effects and introducing special mechanics.
Between difficulty levels I and IV, special mechanisms are not present during the fight.
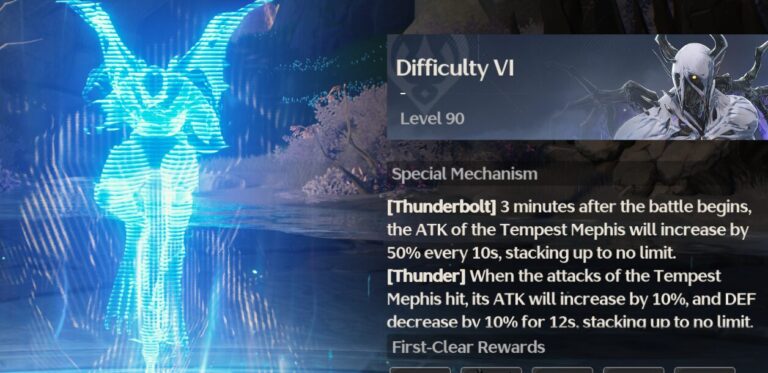
On difficulties V and VI, the following modifiers are in effect:
Check here for the Special Mechanisms
[Bone Chilling] - 3 minutes after the start of the fight, Mourning Aix increases its ATK by 50% every 10 seconds. This effect stacks without limit.
[Panic] - If a character is not at full HP while attempting to dodge, they will consume an additional 10 stamina each dodge.
[Lurking] - Every 6th consecutive successful parry will additionally decrease the boss’ Vibration Strength by 40%. The counter for the parries is reset upon taking damage from the boss.
Preparation Before the Battle
Choose the Right Attribute and Weapon
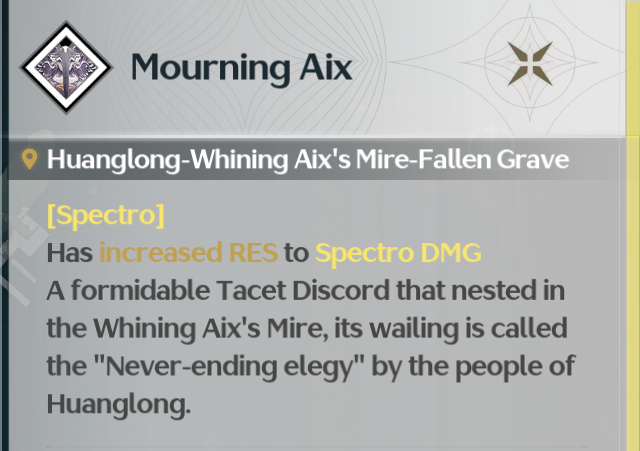
Mourning Aix has increased resistance to Spectro damage. Avoid bringing Spectro characters for the damage dealing roles in your team.

If you are confident in your dodging and parrying ability, you may use quick weapon types like swords and gauntlets in order to abuse the Lurking special mechanism and ground the Aix before unloading every bit of damage you have into it while it’s vulnerable. However, because a lot of its attacks are not parryable, you may alternatively opt to use pistols to keep the boss at a range where the only dangerous attacks are heavily telegraphed.
Craft Potions and Cook Dishes Beforehand

For an extra edge during the fight, you may opt to consume food and medicine, granting you increased character stats and healing or reviving them as needed. Remember: they’re a resource to be used and there is no shame in doing so - the Tactical Holograms are some of the hardest content the game has to offer.
Some of the recommended consumables include:
| Dish/Medicine | Boosts | Boost Type |
| Morri Pot Jinzhou Maocai Wuthercake Kudzu Congee Shuyun Herbal Tea | ATK / Crit Rate / Crit DMG | Offensive (Dish) |
| Crispy Squab Rising Loong Candied Caltrops Caltrop Soup Star Flakes | DEF / Max HP | Defensive (Dish) |
| Harmony Tablets Drummer Solvent String Solvent Havoc Petrol Glacio Petrol Electro Petrol Aero Petrol Fusion Petrol | Elemental Damage Bonus / Energy Regen / Concerto Energy Gain | Offensive (Medicine) |
| Vigor Tablets Passion Tablets Spectro Resistance Spray | Elemental Resistance / Energy Regen / Concerto Energy Gain | Defensive (Medicine) |
| Premium Energy Bag Advanced Energy Bag Medium Energy Bag Basic Energy Bag | Healing | Healing (Medicine) |
Mourning Aix Skill Set
Note: This guide is based on Difficulty 6 Level 70. Please refer to the Special Mechanism. Not all skill sets will be added here, mostly the notable ones only.
Standard Moveset
Homing Projectiles
An attack usually combo'd with other attacks, dodging the projectiles will depend on your distance from the boss. As a general rule of thumb, the closer you are to Aix, the fewer dodges will be needed. This move is usually used after a different move, with projectiles coming in sets of threes.
Solo Laser
Aix targets a resonator and fires a laser at them. While this can be dodged normally, quick swapping to a different resonator doesn’t change Aix’s targeting if the previous resonator is still on-field, allowing for an easy evade.
Laser with Projectiles
A variation of Aix’s laser attack with 2 lasers approaching from the left and right side. This is immediately followed up by one set of projectiles. It is recommended to dodge out of the laser and avoid where the laser was fired. It has a lingering AoE which can kill your resonators even after dodging the attack. As well, one set of projectile attacks will also home in towards you.
Claw Swipe
Aix flies backward and charges at you with its claw on the ground. This attack has a long wind-up time and even shows you when to dodge the attack, as a circle shows up on the attacking hand.
Wing Swipe
Most of what was said in Claw Swipe also applies here, but Aix now twirls around before attacking.
Double Tail Swipe
Both attacks have a circle telegraph around Aix's tail for easy dodge timings.
Recovery Combo
After Aix recovers from being downed, it will instantly follow up with a scream that deals damage and begin a 7 attack combo. Note that this attack sequence can also be used at any time, even if Aix is not downed.
Grabs/Parryable Attacks
Aerial Grab Close
This attack begins with Aix spinning backwards and pausing slightly, then following up with a straight grab toward you. The most visibly telegraphed indicator to look for is when Aix’s wings begin to glow, and you can easily parry during this timing window with a multi-hit attack.
Aerial Grab Far with Projectiles
A variation of Aix’s aerial grab, and this one is much worse. The combo begins with Aix flying upwards, circling behind you to perform the grab. In theory, this attack is simple to deal with - dodge into it or parry as you see Aix’s wings light up.
The main issue comes with the lock-on feature, as it can just decide to not function. As a result, you’ll have to find Aix’s position manually, and the best way to deal with this attack is to quickly adjust your camera or get a feel for the timing.
If you decide to dodge the grab, Aix will always follow up with 3 sets of projectile attacks. Dodging these will depend on your distance from the boss. As a general rule of thumb, the closer you are to Aix, the fewer dodges are required.
Grounded Grab 1
Aix moves back slightly and quickly follows up with a grab attack. A relatively slow attack that’s clearly telegraphed by both of Aix’s hands glowing before attacking.
Grounded Grab 2
Aix has one more grounded grab attack, but this time decides to give you enough time to make dinner, eat it, and wash the dishes before finally deciding to telegraph the attack. This version of the attack gives you roughly 3 entire seconds to react and can be parried when you see Aix’s hands glow.
5-Hit Combo
We recommend dodging the first 3 attacks as they come out quickly. The 4th attack has a slight delay and ring telegraph for an easy parry. Alternatively, you can also just dodge all 5 attacks if your Resonator can’t parry or you prefer dodging.
Difficulty 6 Showcase
All Rewards From Tactical Hologram
| Difficulty & Level | Rewards |
|---|---|
| Difficulty 1 (Level 45) | Astrite ×20 Mourning Aix (4 Star) Data set ×200 Advanced Sealed Tube ×1 Shell Credit ×10,000 |
| Difficulty 2 (Level 55) | Astrite ×20 Mourning Aix (4 Star) Data set ×200 Advanced Sealed Tube ×2 Shell Credit ×15,000 |
| Difficulty 3 (Level 60) | Astrite ×20 Mourning Aix (5 Star) Data set ×250 Premium Sealed Tube ×1 Shell Credit ×15,000 |
| Difficulty 4 (Level 70) | Astrite ×20 Mourning Aix (5 Star) Data set ×250 Premium Sealed Tube ×1 Shell Credit ×20,000 |
| Difficulty 5 (Level 80) | Astrite ×20 Mourning Aix (5 Star) Data set ×250 Premium Sealed Tube ×2 Shell Credit ×20,000 |
| Difficulty 6 (Level 90) | Astrite ×20 Mourning Aix (5 Star) Data set ×150 Premium Sealed Tube ×2 Shell Credit ×20,000 |