Table of Contents
Dealing damage is an integral part of Wuthering Waves gameplay loop - you cannot progress without resorting to violence at some point in your journey, and that of course means you want to hit them as hard as you can.
In this guide, I will attempt to explain how the big numbers are created on the backend side of things so you can better understand our upcoming major updates to character guides, as well as have the necessary knowledge needed to successfully improvise if your unique account state does not allow you to fully utilize one.
[Update 06/06/24]: Thanks to everyone's collective feedback, we've caught several mistakes in the article and updated it accordingly. Thank you!
Damage Calculation Formula
The Formula Simplified
The calculation can be broken down into three parts for ease of understanding:
- First, we multiply our character’s ATK stat by the chosen skill’s multiplier.

Let’s call this number “Skill Hit”, because that’s what it is - the base damage of our hit!
- Then, we take the number we’ve just got and multiply it by all of our damage boosts.

We’ll call our result “Expected Hit”. This is the damage number you will see when hitting a neutral entity like animals as they have no defences or protections. It is also a good way of seeing if our math adds up so far. Be sure to consider your critical hit damage only for the critical strikes!
- Finally, we yet again multiply our result, this time by enemy resistances.

Voila! This number, rounded up for standard hits and down for critical hits, is our final damage when we hit the enemy.

Now, it is important to note how various bonuses interact with each other. Let us go through each of the elements of the formula and look at them separately.
Character’s ATK
One of the two primary factors in calculating damage and the statistic requiring the least amount context. In short, it serves as the base of almost every damage calculation in the game and follows the principle of “a bigger number is a better number”.
Your final ATK is calculated by adding the character’s and their weapon’s attack together, then applying the combined percentage bonus from all sources, and finally adding all flat increases. It’s worth noting that attack boost can appear on any Echo in the game, as both primary and secondary statistics, potentially even at the same time.
Character’s Skill Multiplier
The other primary factor of damage calculation, accessible upon clicking on the desired skill in the Forte tab of the character page.
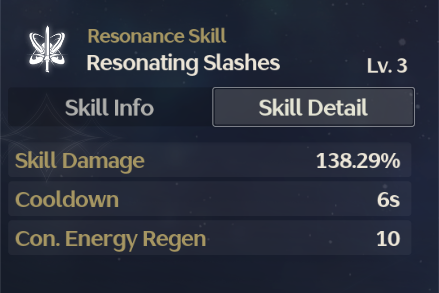
This is the efficiency ratio at which your ATK stat is applied to the skill. It can be increased through leveling up the ability in question, up to double the percentage at the maximum rank of 10.
Skill scaling bonus
The damage multiplier increase from effects such as Encore’s third resonance. It is different from effects found on Echoes and weapons as it increases skill’s base scaling multiplicatively and refers to the skill’s damage (ATK) multiplier directly.

Elemental Damage Bonus
The first layer of secondary damage-increasing sources, and the one with the least amount of quirks and nonsense to consider. It effectively increases all damage the character deals, including that coming from the equipped primary (top-most) Echo, provided the bonus matches the character's element.
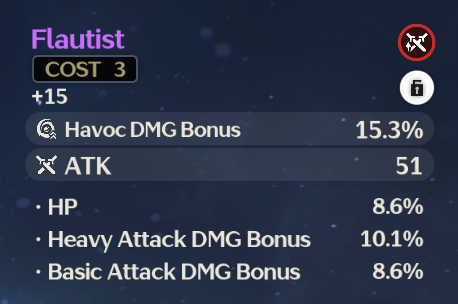
The bonus can be randomly found on the 3-Cost Echoes as the primary statistic, as well as Sonata Effects (Echo set bonuses) and certain character Outro skills buffing the next team member switched to. All sources of elemental damage bonus are additive to each other.
Of particular note is the effect the game calls “DMG Bonus of all Resonance Attributes” found for example on the Verdant Summit broadblade. Somewhat contrary to what one might think, this is just many words to say “increases all elemental damage by X%”. The effect is additive to all other sources of elemental damage increase.
Skill Damage Bonus
This refers to all the effects that increase the damage of a particular move, such as basic attack or Resonance Liberation, and are worded as “X DMG Bonus” (see previous example). These effects can be found on Echoes, weapons and as field effects such as in Tacet Fields. Whenever they take effect, they are additive to the elemental damage bonus and each other.
Deepen Effect
The bonus that is explained the least clearly in-game is easily the Deepen Effect. Wuthering Waves never openly states what it does, it only implies it does “something”. And that something, fortunately for us, is yet another way to increase the power of our strikes.
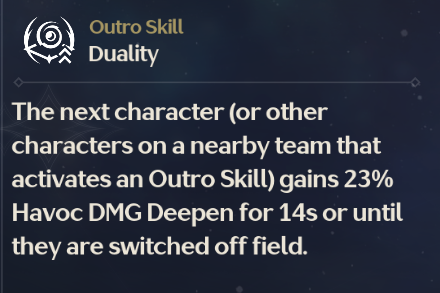
As much as I’d like to end the explanation here, Deepen comes with two major caveats to consider. First and the immediately obvious one is accessibility to this modifier. At the time of writing this guide, the only way Deepen is ever applied is via character Outro skills - which in turn forces rotational style of play in order to maximise the amount of damage we can deal.
Second thing to consider is how specific it can be. For instance, Danjin’s Outro skill “Duality” applies to all Havoc damage dealt by the next character switched to, while Sanhua’s Outro “Silversnow” would only apply to basic attack damage (regardless of element). That said, depending on how specific the boost is, the magnitude of it changes as well, with more specific conditions for it to apply yielding greater boost, and it is important to consider the character skill rotation and individual moves when making the choice on how to incorporate it.
While playing solo doesn’t allow you to stack multiple sources of Deepen, under specific conditions it is possible to stack them during cooperative play. In such a scenario, they are additive to each other.
Critical Hit Damage
With critical hits being a thing since 19th century Prussian wargames, they need little introduction: you smack the enemy and if you’re lucky, you deal multiplicatively more damage than normal, with the increase basing off your critical damage statistic.
Both critical hit and critical damage can randomly be found as main stats of 4-Cost Echoes, and can potentially be tuned as a secondary statistic of any Echo in the game, regardless of the main bonus. When building your character for critical hits, try to get a 2% critical damage bonus for every 1% critical hit chance, keeping in mind that your actual critical bonus is whatever number you see on your statistic screen minus 100%.
Two major exceptions exist:
One - you’ve already reached 100% critical hit chance, in which case adding more will provide no benefit at all.
Two - your character is under the effect of buffs increasing either their critical hit chance or critical damage bonus during their big DPS window, in which case you ought to compensate for it when determining the 1:2 split.
Enemy Defence Modifier
We finally get to the portion of the formula that reduces your damage dealt and we start off with the most annoying to deal with modifier - enemy defence, or DEF for short. The topic of DEF is something that needs its own dedicated section of the guide as during testing several data points surfaced that required adjusting the way of explaining it.
For a very close approximation, assume the enemy DEF modifier reduces your damage by half when hitting enemies of equal level bracket (1~10, 11~20, 21~30…). At the time of writing this guide, there is no way for the player to reduce enemy defence in any way. We will update this section with new findings whenever this changes. Stay tuned!
Enemy Elemental Resistance
The last portion of the damage formula is enemy elemental resistance, which is an additional layer of defence for the enemy, and potentially another layer of damage increase for us. Contrary to certain other games, in Wuthering Waves enemies do not have negative elemental resistance naturally.

Most enemies listed in the Data Bank have a mention of resisting damage of a certain type. When the enemy is hit by the damage type they resist, they reduce damage taken by about 33.3%. This means that even if we have a reliable way to reduce their resistance, using characters of the element that the boss resists is still inadvisable.
However, this is where a plot twist comes into play: enemy resistances can be reduced into negative values, effectively multiplicatively boosting our damage instead of reducing it. Each increase and decrease to the elemental resistance is additive to each other.
Player Defence vs Enemy Defence
Now that we’ve talked about dealing damage, let’s talk about defending against it. And we’ll start with enemy defence, as it was mentioned that it needs its own dedicated section.
Enemy DEF
While at the time of writing this article the exact numbers aren’t known, we’ve calculated that the enemy defence modifier within the same level range as your character can be averaged to 52% multiplicative damage reduction, fluctuating between ~53% and ~49%. The range result was consistent between different enemies, bosses, weapon types and elements used, both while resisting or being vulnerable thanks to resistance shred to a given element.
This reduction seems to increase and decrease respectively by about 2% for every level bracket of difference between your character and the enemy in question, meaning eventually, specifically from SOL3 Phase 4 onwards, it can be simplified to:

The end result will be accurate enough that the fluctuation margin can be safely ignored for the actual application.
Player DEF
Unlike the enemy defence, the player DEF stat works differently. While most of the damage formula still applies to us, playable characters instead reduce the damage by a flat value equal to their DEF statistic before any percentage modifiers - which unfortunately makes stacking defence at higher world levels about as worth it as potential attempts at talking out our differences with the Tacet Discords we fight.
Damage per Second With an Example
Let us make a clear distinction between damage per hit and damage per second. Most character guides will explain the power of the character as the averaged amount of punishment they can dish out over a single second - or DPS for short. This guide so far explained the maths for damage per hit.
In order for us to know the theoretical damage per second for a given character, we have to find out two things: the total damage dealt across our entire combo, and how much time they spend doing said combo. Why do I specify that the calculation is theoretical? Because the final result will vary wildly between different players and different circumstances they encounter themselves in - you could mess up the combo by accident, or the boss might move and cause you to miss an attack, or perhaps your mum called you for dinner and you paused the game. The bottom line is that the final final DPS, at the end of the day, has more variables than the scope of this guide covers.
Now, to the actual maths. In order to visualise how this works, let’s take a theoretical scenario under the microscope:
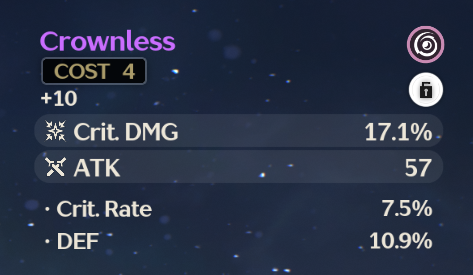
Our Rover (Spectro) hit The Crownless with three basic attacks and one jump attack of level 3 over the course of three seconds. Let us assume both are in the same level bracket and Rover has a total of 800 ATK with no other bonuses present, and since our punching bag does not resist his damage type, we don’t have to worry about the enemy's elemental resistance. We can find out our theoretical DPS by adding together the damage dealt of each hit (133 + 170 + 71 x 5 + 236) and dividing it by the amount of seconds it took to use them (3).

In our theoretical scenario, Rover’s DPS equals 298 damage per second. Which isn’t a lot, but it's honest work. Again, please keep in mind it is a simplified example. As the character skill rotations get more complicated and longer, as more circumstances are accounted for, as you are forced to dodge attacks and as you get better at playing your chosen Resonator, your final DPS will be impacted - either positively or negatively.
Hopefully that answers all the questions you might have regarding how to calculate your damage!
Why the Numbers Work the Way They Do
…Still here?
In that case, welcome to the part of the guide where I show you why most people improvising their builds screw up, and why do the guides recommend the equipment choices they do. Before we start, I want you to understand something: math sucks because it isn’t explained in a comprehensive, easy to digest fashion, making you think it is needlessly complicated and abstract. It’s not. It's perfectly logical when you sit down and look at examples that interest you, like pumping up that damage number in a video game. Do not give up if you don’t understand something - apply it in the context of something you like for it to make perfect sense for you.
Diminishing Returns
The concept of diminishing returns is a common pitfall that can be observed across all role-playing games and ties directly to how we perceive numbers. Big bonus is a good bonus, right? Well, yes and no. If we increase our attack by 100%, we just doubled our attack stat - simple. But if we then increase our attack by another 100%, the end result is that we’ve increased our attack by 50% for the same opportunity cost. Why does this happen?
We have to look at both numbers to really get it: our base statistic and what it looks like after the first boost. In a hypothetical scenario of base attack stat being 500, 1500 really is an increase by 200%, but compared to 1000 we had after the 100% boost, those extra percentages apply only half as efficiently for the exact same price and space in our build. And this concept works in scale: every additional 100% will be half as efficient as the last one because you multiply the base value. Past a certain point, it is far better to either increase the base statistic (if possible) or switch the part of the damage source we’re boosting. Which leads me to…
Addition vs Multiplication
Let’s take a look at an exempt from the damage formula:

For the sake of the demonstration let’s ignore everything else for now. In the context of Wuthering Waves, all sources interacting with the specific multiplier are additive to each other, so bonus to a stat from your Echoes and weapon would just be added together. But that’s now what I’m trying to show here.
Increasing one of the formula elements by 30% twice would result in a 60% increase to our damage output. Simple, right? But what would happen if we applied 30% to two different elements, in this instance Elemental Damage Bonus and Deepen? Some people would say the result would be the same, and they would be wrong - the resulting increase to our damage would be 69%. Nice.
So what does that mean? It means that several smaller bonuses affecting each other are far stronger than one large bonus, and more importantly, are far easier to gain since they are smaller. So please, do not focus exclusively on ATK when trying to hit harder - try to mix different sources of damage together, even if at first glance they look weaker separately.
The Full Damage Formula
Hopefully by now, all readers will be able to understand how the damage you deal is calculated, so allow me to provide you with the full damage formula so you can try and apply everything for yourself:

Conclusion
Please be sure to leave a comment if any part of the guide is not clear enough or if damage calculation varies wildly between expected and actual result - I will try to correct any mistakes as soon as possible!